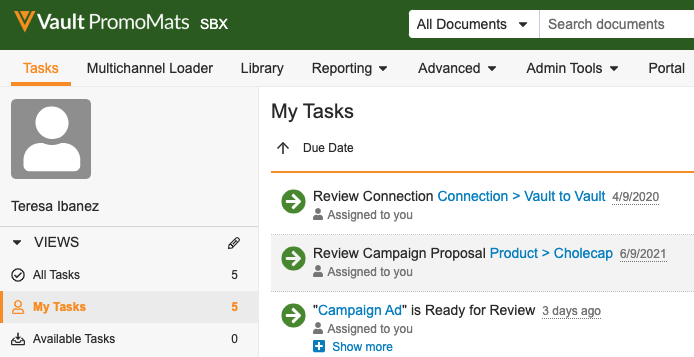
 You can remove this styling using the **SBX** button next to the Vault logo. Once removed, you must log out and log back in to get the styling back. Refreshing the page also returns the styling. This can be useful for taking screenshots in your sandbox Vaults when you want to simulate a user's actual experience.
## Sandbox Domains
Veeva provides one sandbox domain and one production domain. User Acceptance Testing (UAT) Vaults should be in the sandbox domain. If you are testing domain-level settings, Veeva can provide an additional domain for that purpose.
## Sandbox Sizes & Limits {#sizes}
Sandbox Vaults are available in the following sizes with corresponding limits:
| Sandbox Size | Object Record Limit | Document Version Limit | Snapshots Included with Sandbox | Sandboxes Included in Production |
| ------------ | -------------------------- | ------------------------ | :-----------------------------: | :-------------------------------: |
| Small | 0 to 100,000 | 0 to 10,000 | two (2) | four (4) |
| Medium | 100,000 to 1,000,000 | 10,000 to 100,000 | two (2) | two (2) |
| Large | 1,000,000 to 10,000,000 | 100,000 to 1,000,000 | two (2) | zero (0) |
| Very Large | 10,000,000 to 100,000,000 | 1,000,000 to 10,000,000 | two (2) | zero (0) |
| Extra Large | 100,000,000 to 500,000,000 | 10,000,000 to 50,000,000 | two (2) | zero (0) |
| Full | No Limit | No Limit | two (2) | one (1) |
The limit on total object records excludes system-managed object records and configuration data. Sandbox Vaults that exceed these limits are blocked from creating new object records or documents. To remove this block, delete object records or document versions. Admins can then [recheck usage values][1] to ensure that the Vault is compliant.
Each sandbox has a limit of 5GB of document templates, both active and inactive. If you create a sandbox from a Vault with more than 5GB, the resulting sandbox will not have any document templates copied to it.
You can remove this styling using the **SBX** button next to the Vault logo. Once removed, you must log out and log back in to get the styling back. Refreshing the page also returns the styling. This can be useful for taking screenshots in your sandbox Vaults when you want to simulate a user's actual experience.
## Sandbox Domains
Veeva provides one sandbox domain and one production domain. User Acceptance Testing (UAT) Vaults should be in the sandbox domain. If you are testing domain-level settings, Veeva can provide an additional domain for that purpose.
## Sandbox Sizes & Limits {#sizes}
Sandbox Vaults are available in the following sizes with corresponding limits:
| Sandbox Size | Object Record Limit | Document Version Limit | Snapshots Included with Sandbox | Sandboxes Included in Production |
| ------------ | -------------------------- | ------------------------ | :-----------------------------: | :-------------------------------: |
| Small | 0 to 100,000 | 0 to 10,000 | two (2) | four (4) |
| Medium | 100,000 to 1,000,000 | 10,000 to 100,000 | two (2) | two (2) |
| Large | 1,000,000 to 10,000,000 | 100,000 to 1,000,000 | two (2) | zero (0) |
| Very Large | 10,000,000 to 100,000,000 | 1,000,000 to 10,000,000 | two (2) | zero (0) |
| Extra Large | 100,000,000 to 500,000,000 | 10,000,000 to 50,000,000 | two (2) | zero (0) |
| Full | No Limit | No Limit | two (2) | one (1) |
The limit on total object records excludes system-managed object records and configuration data. Sandbox Vaults that exceed these limits are blocked from creating new object records or documents. To remove this block, delete object records or document versions. Admins can then [recheck usage values][1] to ensure that the Vault is compliant.
Each sandbox has a limit of 5GB of document templates, both active and inactive. If you create a sandbox from a Vault with more than 5GB, the resulting sandbox will not have any document templates copied to it.
Note: Snapshots on Large, Very Large, Extra Large, and Full sandbox Vaults are limited to 10,000,000 records, 100,000 document versions, and 50 GB of source content.
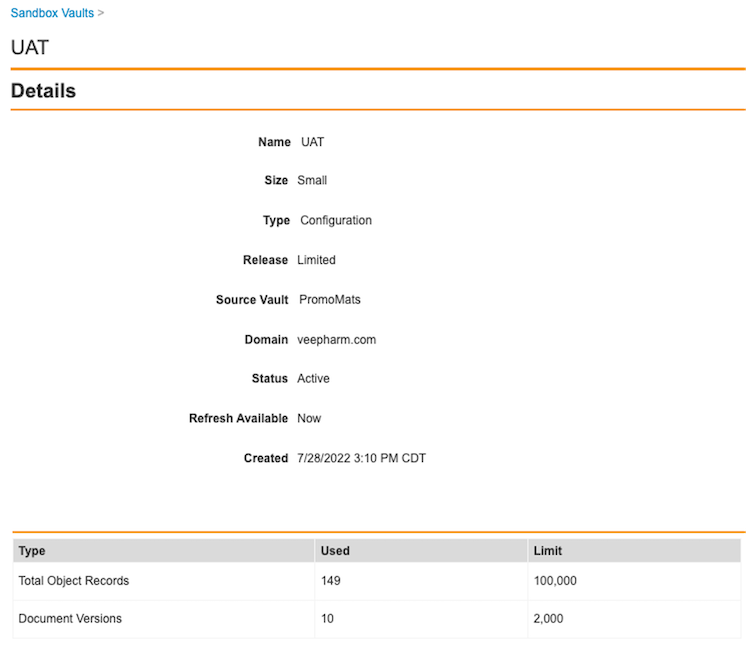 To view the usage details of the sandbox Vault you're currently logged into, navigate to **Admin > Settings** and view the _License Information_. The limit usage values that appear here are initially zero (0) when you create or refresh the Vault. Click **Recheck Usage** to recalculate usage values. This action can be initiated up to 100 times in a 24-hour period.
To view the specific objects and document versions that are consuming data, navigate to **Admin > Settings > Vault Data Usage Information**.
## Creating Sandbox Vaults {#create}
Customers are entitled to four (4) _Small_, two (2) _Medium_, and one (1) _Full_ configuration sandbox Vaults for every production Vault. Prerelease Vaults do not count against these entitlements. If you require more sandboxes, you can place an add-on order with Veeva's finance team. Sandbox Vaults are always in your sandbox domain.
### How to Create Vaults
To create a new sandbox Vault:
1. From your source Vault, navigate to **Admin > Deployment > Sandbox Vaults**. Source Vaults can be a production Vault or another Sandbox Vault with Sandbox allowances.
2. Under _Active Sandbox Vaults_, click **Create**.
3. Select whether to create a sandbox **From Vault** or **From Snapshot**. See details about sandbox snapshots.
4. Enter a **Name** for the new sandbox. See [details for Vault names][3].
5. Select a **Size**. [See details about sandbox sizes and limits][2].
6. Select a **Release**. See [details about sandbox release versions][4].
7. Select a **Domain** for the new Vault. In most cases, there will only be one domain available.
8. Optional: Clear the **Vault Owner: Current User** checkbox. See [details about adding Vault owners][5].
9. Click **Finish**.
10. Optional: If the source Vault contains more than 5GB of document templates, Vault displays a warning. Click **Continue** to proceed without copying any document templates, or **Cancel** to stop the sandbox creation process.
11. The creation process generally takes less than one hour, but may take up to eight hours. When complete, Vault sends you a notification. Expect additional time for sandbox creation requests during release periods. To ensure a successful, timely sandbox creation, you should avoid making requests 24 hours before and after scheduled releases.
### Vault Name {#name}
When creating a new sandbox, the _Name_ value must follow these rules:
* Must be unique across all sandbox Vaults for the current Vault and all Vaults in the domain; note that you may not be able to view all Vaults in the domain.
* Special characters do not make the name unique, for example, _UAT:Sandbox_ and _UAT-Sandbox_ won't count as unique names
* Names are not case sensitive, for example, _UAT\_Sandbox_ and _uat\_sandbox_ won't count as unique names
### Add Current User as Vault Owner {#owners}
The **Vault Owner: Current User** setting adds the Vault Admin creating the sandbox as a Vault Owner in the sandbox Vault, using Cross-Domain User functionality. If you do not enable this setting, the Domain Admin users in the sandbox domain will become Vault Owners in the sandbox Vault.
## Managing Sandbox Allowances {#managing-sandbox-allowances}
Manage sandbox allowances across all your sandboxes, including those created from another sandbox.
The _Available Sandbox Vaults_ section lists the following sandbox limits and allowances:
* **Size**: The sandbox size available.
* **Available**: The total number of sandboxes available for creation or for granting to another sandbox allowance.
* **Allowed**: The total number of sandbox entitlements granted to the current Vault.
* **Temporary**: If enabled, any temporary sandbox allowances.
The _Active Sandbox Vaults_ section provides sandbox details for all current sandboxes of which the current Vault is a direct or indirect parent, including those created from within a source other than the current sandbox.
### How to Set Sandbox Allowances
You can only manage sandboxes created from the current (logged-in) Vault. Sandboxes created from other sandboxes are available for login and viewing only. To set allowances for a sandbox:
1. In your production Vault, navigate to **Admin > Deployment > Sandbox Vaults**.
2. Under _Active Sandbox Vaults_, find the Vault you want to modify the allowances for. From the **Actions** menu on the _Name_ field, select **Set Allowance**.
3. Select the action to take, either **Grant** or **Revoke**.
4. Select the allowance size from the drop-down and enter the number of allowances to grant or revoke. The number of available allowances is shown below the input field.
5. Optional: When granting allowances, check **Use Temporary Allowance** to create allowances out of your pool if temporary allowances are enabled in your Vault.
## How to Change Sandbox Size {#change-sizes}
A Vault Admin can convert a sandbox from one size to another if there are sufficient allowances and the current sandbox meets the data and user limits of the requested size.
To change the size of a sandbox:
1. In your production Vault, navigate to **Admin > Deployment > Sandbox Vaults**.
2. Under _Active Sandbox Vaults_, find the Vault you want to change the size for. From the **Actions** menu on the _Name_ field, select **Change Size**.
3. Select the **Requested Size**. The _Available Sandbox Vaults_ section shows the number of sandboxes available by size. If a requested size has no sandboxes available, you are unable to save your selection.
4. Click **Save**. Vault immediately changes the size of the sandbox and enforces the limits associated with the new size. This change does not affect existing data and configuration.
To change the sizes of multiple sandboxes:
1. In your production Vault, navigate to **Admin > Deployment > Sandbox Vaults**.
2. From the **Actions** menu for _Active Sandbox Vaults_, select **Change Sandbox Sizes**.
3. Select the **Requested Size** for each sandbox. The _Available Sandbox Vaults_ section shows the number of sandboxes available by size. If a requested size has no sandboxes available, you are unable to save your selection.
4. Click **Save**. Vault immediately changes the size of the sandbox and enforces the limits associated with the new size. This change does not affect existing data and configuration.
## How Configuration Copying Works {#configurationcopying}
When creating or refreshing a sandbox, Vault copies the configuration from your production Vault along with records from standard objects marked as configuration data.
It's necessary for some components to be modified during that copying process, as outlined below.
To view the usage details of the sandbox Vault you're currently logged into, navigate to **Admin > Settings** and view the _License Information_. The limit usage values that appear here are initially zero (0) when you create or refresh the Vault. Click **Recheck Usage** to recalculate usage values. This action can be initiated up to 100 times in a 24-hour period.
To view the specific objects and document versions that are consuming data, navigate to **Admin > Settings > Vault Data Usage Information**.
## Creating Sandbox Vaults {#create}
Customers are entitled to four (4) _Small_, two (2) _Medium_, and one (1) _Full_ configuration sandbox Vaults for every production Vault. Prerelease Vaults do not count against these entitlements. If you require more sandboxes, you can place an add-on order with Veeva's finance team. Sandbox Vaults are always in your sandbox domain.
### How to Create Vaults
To create a new sandbox Vault:
1. From your source Vault, navigate to **Admin > Deployment > Sandbox Vaults**. Source Vaults can be a production Vault or another Sandbox Vault with Sandbox allowances.
2. Under _Active Sandbox Vaults_, click **Create**.
3. Select whether to create a sandbox **From Vault** or **From Snapshot**. See details about sandbox snapshots.
4. Enter a **Name** for the new sandbox. See [details for Vault names][3].
5. Select a **Size**. [See details about sandbox sizes and limits][2].
6. Select a **Release**. See [details about sandbox release versions][4].
7. Select a **Domain** for the new Vault. In most cases, there will only be one domain available.
8. Optional: Clear the **Vault Owner: Current User** checkbox. See [details about adding Vault owners][5].
9. Click **Finish**.
10. Optional: If the source Vault contains more than 5GB of document templates, Vault displays a warning. Click **Continue** to proceed without copying any document templates, or **Cancel** to stop the sandbox creation process.
11. The creation process generally takes less than one hour, but may take up to eight hours. When complete, Vault sends you a notification. Expect additional time for sandbox creation requests during release periods. To ensure a successful, timely sandbox creation, you should avoid making requests 24 hours before and after scheduled releases.
### Vault Name {#name}
When creating a new sandbox, the _Name_ value must follow these rules:
* Must be unique across all sandbox Vaults for the current Vault and all Vaults in the domain; note that you may not be able to view all Vaults in the domain.
* Special characters do not make the name unique, for example, _UAT:Sandbox_ and _UAT-Sandbox_ won't count as unique names
* Names are not case sensitive, for example, _UAT\_Sandbox_ and _uat\_sandbox_ won't count as unique names
### Add Current User as Vault Owner {#owners}
The **Vault Owner: Current User** setting adds the Vault Admin creating the sandbox as a Vault Owner in the sandbox Vault, using Cross-Domain User functionality. If you do not enable this setting, the Domain Admin users in the sandbox domain will become Vault Owners in the sandbox Vault.
## Managing Sandbox Allowances {#managing-sandbox-allowances}
Manage sandbox allowances across all your sandboxes, including those created from another sandbox.
The _Available Sandbox Vaults_ section lists the following sandbox limits and allowances:
* **Size**: The sandbox size available.
* **Available**: The total number of sandboxes available for creation or for granting to another sandbox allowance.
* **Allowed**: The total number of sandbox entitlements granted to the current Vault.
* **Temporary**: If enabled, any temporary sandbox allowances.
The _Active Sandbox Vaults_ section provides sandbox details for all current sandboxes of which the current Vault is a direct or indirect parent, including those created from within a source other than the current sandbox.
### How to Set Sandbox Allowances
You can only manage sandboxes created from the current (logged-in) Vault. Sandboxes created from other sandboxes are available for login and viewing only. To set allowances for a sandbox:
1. In your production Vault, navigate to **Admin > Deployment > Sandbox Vaults**.
2. Under _Active Sandbox Vaults_, find the Vault you want to modify the allowances for. From the **Actions** menu on the _Name_ field, select **Set Allowance**.
3. Select the action to take, either **Grant** or **Revoke**.
4. Select the allowance size from the drop-down and enter the number of allowances to grant or revoke. The number of available allowances is shown below the input field.
5. Optional: When granting allowances, check **Use Temporary Allowance** to create allowances out of your pool if temporary allowances are enabled in your Vault.
## How to Change Sandbox Size {#change-sizes}
A Vault Admin can convert a sandbox from one size to another if there are sufficient allowances and the current sandbox meets the data and user limits of the requested size.
To change the size of a sandbox:
1. In your production Vault, navigate to **Admin > Deployment > Sandbox Vaults**.
2. Under _Active Sandbox Vaults_, find the Vault you want to change the size for. From the **Actions** menu on the _Name_ field, select **Change Size**.
3. Select the **Requested Size**. The _Available Sandbox Vaults_ section shows the number of sandboxes available by size. If a requested size has no sandboxes available, you are unable to save your selection.
4. Click **Save**. Vault immediately changes the size of the sandbox and enforces the limits associated with the new size. This change does not affect existing data and configuration.
To change the sizes of multiple sandboxes:
1. In your production Vault, navigate to **Admin > Deployment > Sandbox Vaults**.
2. From the **Actions** menu for _Active Sandbox Vaults_, select **Change Sandbox Sizes**.
3. Select the **Requested Size** for each sandbox. The _Available Sandbox Vaults_ section shows the number of sandboxes available by size. If a requested size has no sandboxes available, you are unable to save your selection.
4. Click **Save**. Vault immediately changes the size of the sandbox and enforces the limits associated with the new size. This change does not affect existing data and configuration.
## How Configuration Copying Works {#configurationcopying}
When creating or refreshing a sandbox, Vault copies the configuration from your production Vault along with records from standard objects marked as configuration data.
It's necessary for some components to be modified during that copying process, as outlined below.
Note: Upon completion, it is possible for a copied component to be inactivated during sandbox creation. This can happen if certain dependencies cannot be resolved, which may result in the aspects of the configuration functioning differently than the source Vault. Your organization’s implementation strategy should include steps to ensure these items are addressed.
Note: In certain circumstances, you may exceed your allowance on the number of sandboxes for the current Vault. If this happens, your allowance will show a negative number and you will not be able to refresh any sandbox Vault. You must delete one or more sandbox Vaults to enable the refresh option.
Note: Selecting the Delete action opens a dialog that asks you to run the Change Source Sandbox action to retain any snapshots of the sandbox. Click Skip and Delete to delete the sandbox along with its associated snapshots or click Go to Snapshots to perform the Change Source Sandbox action. After changing the source sandbox, return to this page to continue deleting the sandbox Vault.
Note: Sandbox Vaults may appear unavailable or show an error immediately after creation or refresh. This indicates that the Vault is still indexing, meaning that sessions and cookies are cleared. Wait five (5) minutes and refresh your browser.
| Type | Permission Label | Controls |
| Security Profile | Admin: Sandbox: Read | Ability to view sandboxes in the Admin > Deployment > Sandbox Vaults page |
| Security Profile | Admin: Sandbox: Create | Ability to create sandboxes in the Admin > Deployment > Sandbox Vaults page |
| Security Profile | Admin: Sandbox: Edit | Ability to edit and refresh sandboxes in the Admin > Deployment > Sandbox Vaults page |
| Security Profile | Admin: Sandbox: Delete | Ability to delete and refresh sandboxes in the Admin > Deployment > Sandbox Vaults page |