Sandbox Vaults are copies of your production Vault, which your organization can use to develop and test configuration changes, data migrations, and integrations, without affecting your production Vault and users. Sandbox Vaults are critical to an effective change control process. Creating a sandbox for a new project and refreshing your sandboxes often will help your organization avoid issues and delays when deploying changes in production.
Vault Admins can create, refresh, and delete sandboxes through the Admin UI or API. Sandbox administration options are available from the production Vault.
When you log into sandbox Vaults, they will have a green banner to help you distinguish between your sandbox and production Vaults.
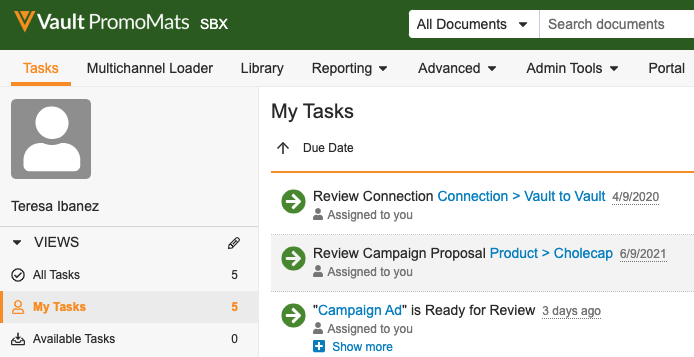
You can remove this styling using the SBX button next to the Vault logo. Once removed, you must log out and log back in to get the styling back. Refreshing the page also returns the styling. This can be useful for taking screenshots in your sandbox Vaults when you want to simulate a user’s actual experience.
Sandbox Domains
Veeva provides one sandbox domain and one production domain. UAT Vaults should be in the sandbox domain. If you are testing domain-level settings, Veeva can provide an additional domain for that purpose.
Sandbox Limits
Sandbox Vaults can contain a maximum of:
- 1,000,000 total object records
- 10,000 document versions
Sandbox Vaults that exceed these limits may be locked.
Viewing Usage Details
To view the usage details for a specific sandbox Vault, navigate to Admin > Deployment > Sandbox Vaults and click the Vault name. The limit usage values that appear here are initially zero (0) when you create or refresh the Vault and only update once every 24 hours.

Creating Sandbox Vaults
Customers are entitled to three (3) configuration sandbox Vaults for every production Vault. If you require more than three, you can place an add-on order with Veeva’s finance team. Sandbox Vaults are always in your sandbox domain.
How to Create Vaults
To create a new sandbox Vault:
- In your production Vault, navigate to Admin > Deployment > Sandbox Vaults.
- Under Active Sandbox Vaults, click Create.
- Enter a Name for the new sandbox. See details for Vault names.
- Select Configuration as the Type. At this time, this is the only sandbox type available.
- Select a Release. See details about sandbox release versions.
- Select a Domain for the new Vault. In most cases, there will only be one domain available.
- Optional: Clear the Vault Owner: Current User checkbox. See details on adding Vault owners.
- Click Finish. The creation process generally takes less than one (1) hour, but may take up to eight (8) hours. When complete, Vault sends you a notification.
Vault Name
When creating a new sandbox, the Name value must follow these rules:
- Must be unique across all sandbox Vaults for the current Vault and all Vaults in the domain; note that you may not be able to view all Vaults in the domain.
- Special characters do not make the name unique, for example, UAT:Sandbox and UAT-Sandbox won’t count as unique names
- Names are not case sensitive, for example, UAT_Sandbox and uat_sandbox won’t count as unique names
Add Current User as Vault Owner
The Vault Owner: Current User setting adds the Vault Admin creating the sandbox as a Vault Owner in the sandbox Vault, using Cross-Domain User functionality. If you do not enable this setting, the Domain Admin users in the sandbox domain will become Vault Owners in the sandbox Vault.
Managing Sandbox Allowances
Manage sandbox allowances across all your sandboxes, including those created from another sandbox.
The Available Sandbox Vaults section lists the following sandbox limits and allowances:.
- Type: The type of sandbox available. At this time, Configuration is the only sandbox type available.
- Available: The total number of sandboxes available for creation or for granting to another sandbox allowance.
- Allowed: The total number of sandbox entitlements granted to the current Vault.
- Temporary: If enabled, any temporary sandbox allowances.
The Active Sandbox Vaults section provides sandbox details for all current sandboxes which the current Vault is a direct or indirect parent of, including those created from within a source other than the current sandbox.
How to Set Sandbox Allowances
You can only manage sandboxes created from the current (logged-in) Vault. Sandboxes cloned from other sandboxes are available for login and viewing only. To set allowances for a sandbox:
- In your production Vault, navigate to Admin > Deployment > Sandbox Vaults.
- Under Active Sandbox Vaults, find the Vault you want to modify the allowances for. From the All Actions menu on the Name field, select Set Allowance.
- Select the action to take, either Grant or Revoke.
- Select the allowance type from the drop-down and enter the number of allowances to grant or revoke. The number of available allowances is shown below the input field.
- Optional: When granting allowances, check Use Temporary Allowance to create allowances out of your pool if temporary allowances are enabled in your Vault.
How Configuration Copying Works
When creating or refreshing a sandbox, Vault copies (clones) the configuration from your production Vault. The following are not included:
- Documents
- Object records for certain objects (This list varies by application. Contact your Veeva representative for a full list of included and excluded objects. This list is subject to change without notice.)
- Users (Note that groups are included in the configuration copy, but user membership is not.)
- Auto Managed Groups where the Allow selection in configurations setting is not enabled
- Domain-level settings (SSO, security policies, etc.)
- User-specific security overrides (We recommend configuring security overrides using groups, not individual users.)
You can recreate most of the excluded items in the new sandbox Vault using Configuration Migration Packages and Vault Loader.
You may also need to re-establish your Vault’s connection records.
Currently Processing Error
In some cases, attempting to create or refresh a sandbox will result in the following error:
Vault is currently processing a separate action. Please try sandboxing again later.
This occurs when the Vault is in the process of enabling or upgrading a feature. During this process, we block any configuration cloning actions in order to prevent invalid configurations in the sandbox. We suggest waiting 20 to 60 minutes and trying again. If this error persists for more than 90 minutes, contact Veeva Support.
Refreshing Sandbox Vaults
Refreshing an existing sandbox Vault overwrites the sandbox configuration with the latest configuration from the Source Vault. See the above section for a list of items that Vault excludes during sandbox creation and refresh.
How to Refresh Vaults
To refresh a Vault:
- In your production Vault, navigate to Admin > Deployment > Sandbox Vaults.
- Under Active Sandbox Vaults, find the Vault you need to refresh. Use the gear icon on the Name field to open the All Actions menu and choose Refresh.
- A pop-up message appears to warn you that refreshing deletes the Vault’s current configuration. Click Continue to start the refresh process. The refresh process generally takes less than one (1) hour but may take up to eight (8) hours. When complete, Vault sends you a notification.
Note: You can only refresh a sandbox Vault once in a 24-hour period. In certain circumstances, you may exceed your allowance on the number of sandboxes for the current Vault. If this happens, your allowance will show a negative number and you will not be able to refresh any sandbox Vault. You must delete one or more sandbox Vaults to enable the refresh option.
Overwriting Configuration
There is no way to retrieve configurations, data, or documents from a previous version of the sandbox Vault after refreshing, however, you can create a Test Data package to export configurations and object data before refreshing your sandbox and import the package after refreshing.
As with creating new sandboxes, Vault does not include users from the production Vault when refreshing. However, Vault does preserve Vault membership from the previous sandbox configuration, so you do not need to re-add the users who previously had access.
Refreshing removes all files from the file staging server.
Sandbox Users
Sandbox users with assigned security profiles that exist in the production Vault retain their access rights after a refresh.
Users with assigned security profiles that do not exist in the production Vault do not get added automatically after a refresh. Vault owners must add those users manually, and select a new security profile at that time.
Deleting Sandbox Vaults
Existing sandbox Vaults may be deleted unless the sandbox is a source Vault for a different sandbox. In most cases, you would refresh a sandbox Vault, rather than deleting. Deleting is only required if you need a sandbox with a different name or need to remove all existing sandbox users. When deleting a sandbox Vault, you may see the sandbox in a “deleting” state temporarily.
Note: Deleted sandboxes cannot be recovered.
How to Delete Vaults
To delete a Vault:
- In your production Vault, navigate to Admin > Deployment > Sandbox Vaults.
- Under Active Sandbox Vaults, find the Vault you need to delete. Use the gear icon on the Name field to open the action menu and choose Delete.
- A pop-up message appears to warn you that you cannot recover a deleted Vault. Click Continue to start the deletion process. The delete process may take several minutes. When complete, Vault sends you a notification.
Note: You cannot delete a sandbox Vault that was created or refreshed within the last 24 hours.
Linked FTP Servers
Some Vaults are set up with “linked” FTP servers, meaning that the sandbox shares an FTP server with another Vault. FTP servers are only linked by customer request through Veeva Support. If your sandbox has a linked FTP server, you will need to contact Veeva Support to unlink the sandbox from the shared FTP server before you can delete the Vault.
Granting Access to Sandbox Vaults
When creating a new sandbox, you have the option to add the current user with the Vault Owner profile. See Add Current User as Vault Owner. These Vault Owner users can configure access for other users. Users with the appropriate access can also remove the automatically added Vault Owners if needed.
User access works as it does in production Vaults: Admins can add entirely new users, grant access to existing domain users, or add cross-domain users.
Note: Sandbox Vaults may appear unavailable or show an error immediately after creation or refresh. This indicates that the Vault is still indexing, meaning that sessions and cookies are cleared. Wait five (5) minutes and refresh your browser.
Logging into Sandbox Vaults
Users with access to a Sandbox Vault can log into the sandbox using the same Login page as the production Vault. Production Vault Owners, or Admins with appropriate permissions, can also log into the sandbox from the Admin area:
- In the production Vault, navigate to Admin > Deployment > Sandbox Vaults.
- Under Active Sandbox Vaults, use the gear icon on the Name field to open the action menu and choose Log in for the appropriate sandbox.
- Enter valid sandbox user credentials on the Login page.
Sandbox Release Versions
In general, sandboxes have the same release version as the production Vault. However, some organizations with General Release Vaults have options for creating a sandbox using a Limited Release version. Each Limited Release version sandbox Vault counts toward the three (3) configuration sandboxes allowed per production Vault.
This feature allows customers the ability to manage their own Limited Release sandbox to proactively assess new functionality ahead of each General Release. For example, an Admin in a 21R1 General Release Vault could create a sandbox that uses the 21R1.2 Limited Release version.
To enable the Limited Release Sandbox feature, navigate to Admin > Settings and select the Enable Limited Release Sandbox option.
Related Permissions
By default, administration options for sandbox Vaults are only available to Vault Owners. To grant access to other users, use a custom security profile with the following permissions:
| Type | Permission Label | Controls |
| Security Profile | Admin: Sandbox: Read | Ability to view sandboxes in the Admin > Deployment > Sandbox Vaults page |
| Security Profile | Admin: Sandbox: Create | Ability to create sandboxes in the Admin > Deployment > Sandbox Vaults page |
| Security Profile | Admin: Sandbox: Edit | Ability to edit and refresh sandboxes in the Admin > Deployment > Sandbox Vaults page |
| Security Profile | Admin: Sandbox: Delete | Ability to delete and refresh sandboxes in the Admin > Deployment > Sandbox Vaults page |