Signature pages allow Vault to generate a page with electronic signatures for a document and attach that page to the viewable rendition. Signature pages only appear with downloaded renditions and do not affect source files.
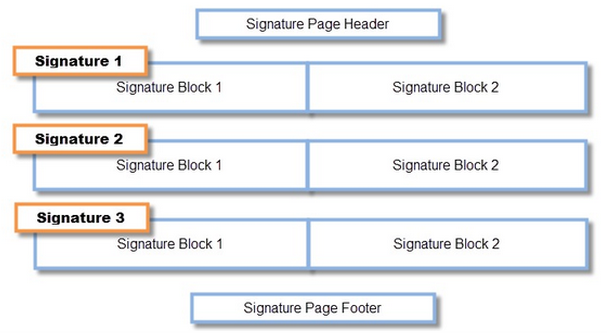
Example Basic Signature Page Layout
Accessing Template Management
From Admin > Business Admin > Signature & Cover Pages, you can manage eSignature page templates as well as the Audit Export Cover Page and Report Export Cover Page template.
About Signature Page Templates
Vault supports both basic and advanced signature page templates.
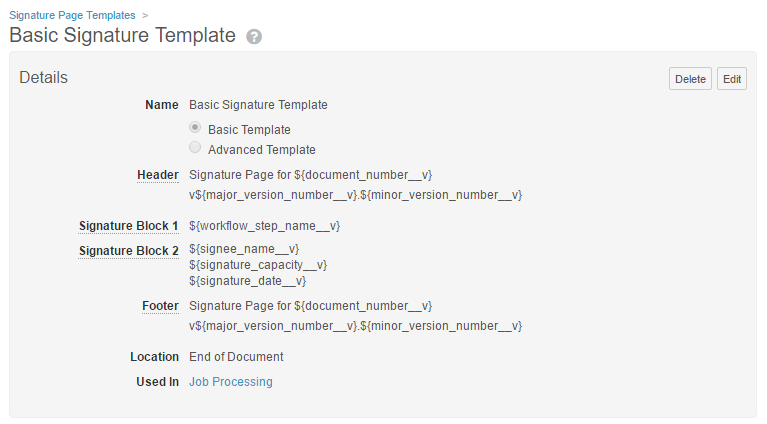
Basic Templates
Basic templates are limited to a few lines of text in the header, footer, and signature blocks. An example layout is shown above. Basic templates are created in Vault as described below.
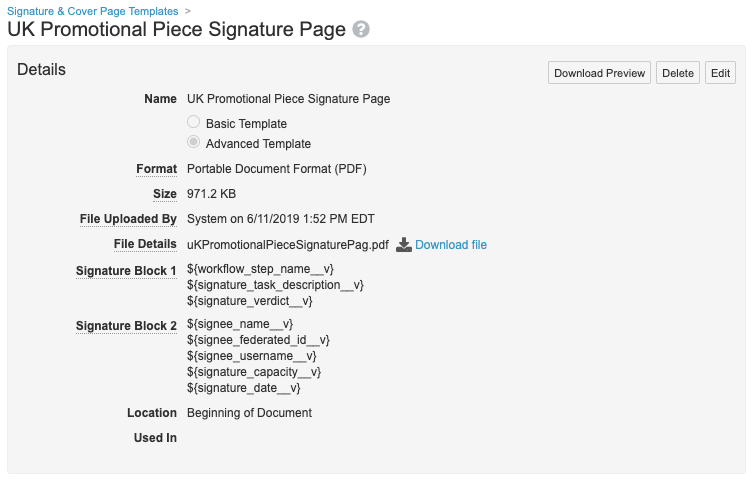
Advanced Templates
An advanced template uses a preconfigured XML Forms Architecture (XFA) PDF file which controls the specific fonts, styles, layout, images, and Vault fields captured when the template is rendered on a document. These are forms-enabled PDF files typically created in Adobe® Experience Manager. You must create the files outside of Vault and upload them as templates.
Learn more about advanced templates below.
How to Create Signature Page Templates
To create a signature page template:
- From the Signature & Cover Page Templates page, click Create Signature Page Template.
- Select either the Basic Template or Advanced Template option button.
- Enter a name for the page. This value only appears in the Admin area.
- If creating a basic template: In the Header and Footer fields, enter text and use the token tool to add fields from the application. Vault will add this content to every signature page above and below the signature blocks as shown in the example above.
- If creating an advanced template: In the File Details field, click Choose and upload the XFA PDF.
- Enter text for Signature Block 1 and Signature Block 2 and use the token tool to add details about the signature (such as: signee name, date, workflow step). Only the fields available from the token tool are valid fields for signature blocks. These blocks display alongside each other and both blocks display for each signature as shown in the example above.
- Select a Location for the signature page. The page can appear at the beginning or end of the document.
- Click Save.
- Once you’ve created a template, assign it to a document lifecycle.
How to Edit Templates
To edit a signature page template:
- From the Signature & Cover Page Templates page, click on the template.
- Click Edit.
- Make any necessary changes.
- Click Save. The new template takes effect immediately for all new signatures.
Note: If Vault has already generated a signature page for a specific document version, that signature page does not update to use the new template. Users will only see the new template if Vault generates the signature page after you save the new template. This happens in two situations: a user applies a new signature to the document version, or no user has ever downloaded the document version’s viewable rendition.
How to Delete Templates
Deleting a template removes it permanently from the Vault. Before deleting, you must change the associated lifecycle to not use the template. To delete:
- From the Signature & Cover Page Templates page, hover over the template.
- Click on the X icon.
- Click Continue in the confirmation dialog.
Versioning & Signature Manifestation
In most situations, signatures manifest only on the version that was active at the time of task completion. However, there are some situations where a user can sign a document in a minor version (for example, 0.9) and if the document is approved (incremented to version 1.0) without further modifications, the document’s signature page will show the user’s signature.
For this to occur, the following must be true:
- The document is in a major version.
- The workflow step (workflow task) with the signature manifestation must occur on the minor version that immediately precedes the current major version. For example, on a document with versions v0.1, v0.2, v1.0, the task must occur on v0.2, not v0.1.
About Advanced Templates
When creating XFA PDF files to use as advanced templates:
- You must use the “Text” field type to add a Vault field, regardless of the field’s type in your Vault. For example, include the document name by inserting a text field labeled name__v. Vault will not accept templates with text field names that do not match document field names in your Vault.
- You must specify a single location in the form for rendering signature blocks. To do this, create one table row that is flagged to repeat. Enter the text field name signature_block_1__v and another named signature_block_2__v in one or two cells within that row.
- To include images, such as your company logo, add them as image objects. Image field objects are not supported within Vault. Image objects must be flagged to embed the image in the PDF.
- Vault can support up to 150 mapped fields in the advanced template.
Here are a few suggestions to help ensure your template looks professional and functions as expected:
- Place form fields in tables so that the order and spacing of elements is preserved with field values of varying length.
- Use a custom Adobe® object style to keep fonts, font sizes and weights consistent.
- Define which elements can be modified (for example: resized, split across pages, or hyphenated).
If you need help getting started, download this sample XFA eSignature template.
About Signature Dates & Times
Vault generally displays dates and times that are adjusted to the current user’s selected time zone. However, on signature pages, the signature date and time appears in UTC.
About Signature Page Sizing
Generated signature pages have the same dimensions as the first page of the viewable rendition. Note that they always use portrait layout. For advanced templates, Vault will not resize the template.
About Character Limits
When using tokens in the signature page header or footer, keep in mind that these areas have maximum character limits. Consider the maximum length of the fields related to each token. Vault truncates the text on a single line after it reaches the maximum, so you may notice that some details are not visible when the tokens resolve.
The limit is 80 characters per line. Both the header and footer allow two lines, but will not wrap text that goes over the limit.